This Tutorial will walk you through initial login and the various capabilities of the tracking system, including Mapping, Reporting and Administrative capabilities. The intention of this tutorial is to be a step-by-step guide, showing how each of these various features and capabilities of the software are accessed and exercised in order to learn how it can be of benefit to you and your business.
The tracking system is very configurable and your specific installation may be configured differently from what is described in this document. This document covers the default and most common configuration of the tracking system.
Other features may be addressed in other tutorials.
The tracking system user login can be found by clicking the "Portal Tracking" button above or clicking here.
Mozilla Firefox and or Google Chrome are recommended browsers. Set one of these to your default browser. Do NOT use Internet Explorer.
You will be presented with a Login window as shown below.

The system can be navigated around using the top menu bar pictured in below screen shot, the various sections on this will depend on the account and what features it has, for example Jobs will only be on accounts which dispatch jobs back to units in the field.

Click the Mapping menu bar at top of screen to open the Mapping Selection Menu, select Dispatch Map
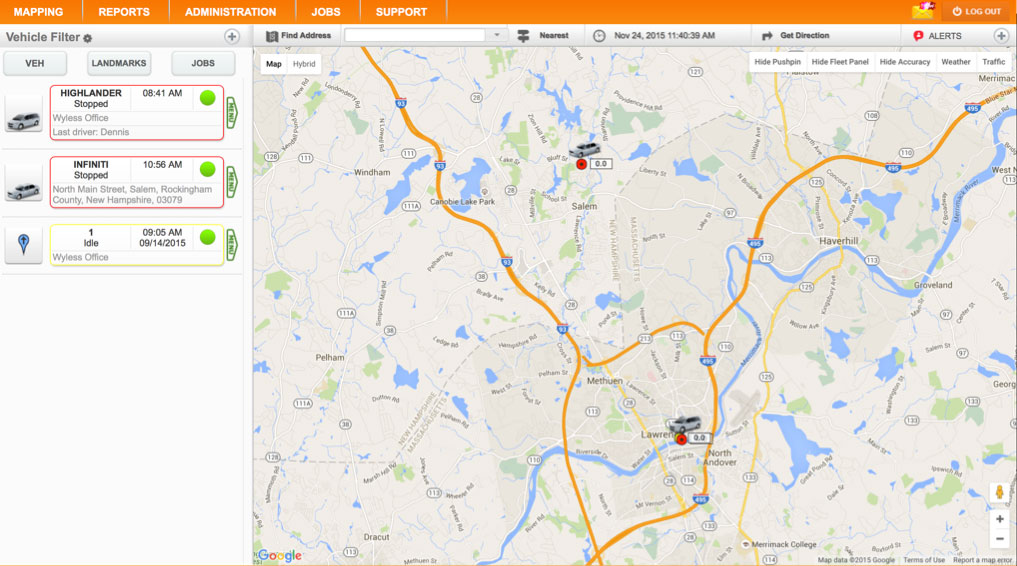
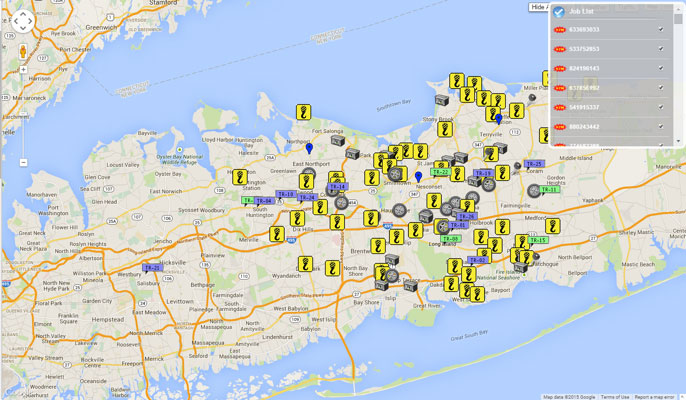
The Dispatch Map is like mission control. It allows the user to have a clear view of the status of the fleet with location awareness. You will find that you spend most of your time on this screen/map.
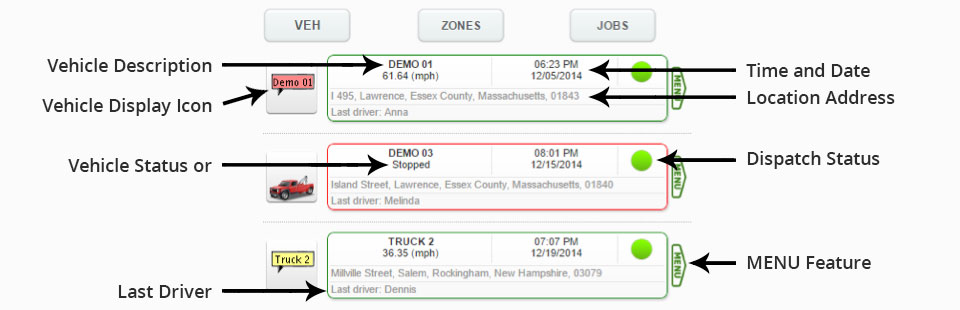
The vehicle list and information box displays all of your fleets assets on the left hand side. This view includes the vehicle display icon, vehicle description, vehicle status, time and date (no date is current date) of last update, location address, last driver if assigned and MENU feature.
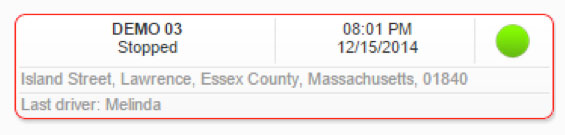
The band that surrounds the Vehicle information box is color coded to represent vehicle status.
= Vehicle is Stopped, ignition is off
= Vehicle is Moving, speed is displayed in information box
= Vehicle is Idling
= Vehicles PTO is engaged
The following example shows the band is RED, indicating the vehicle is stopped.
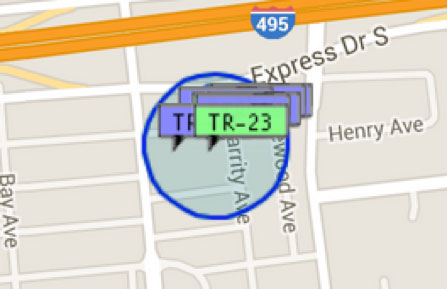
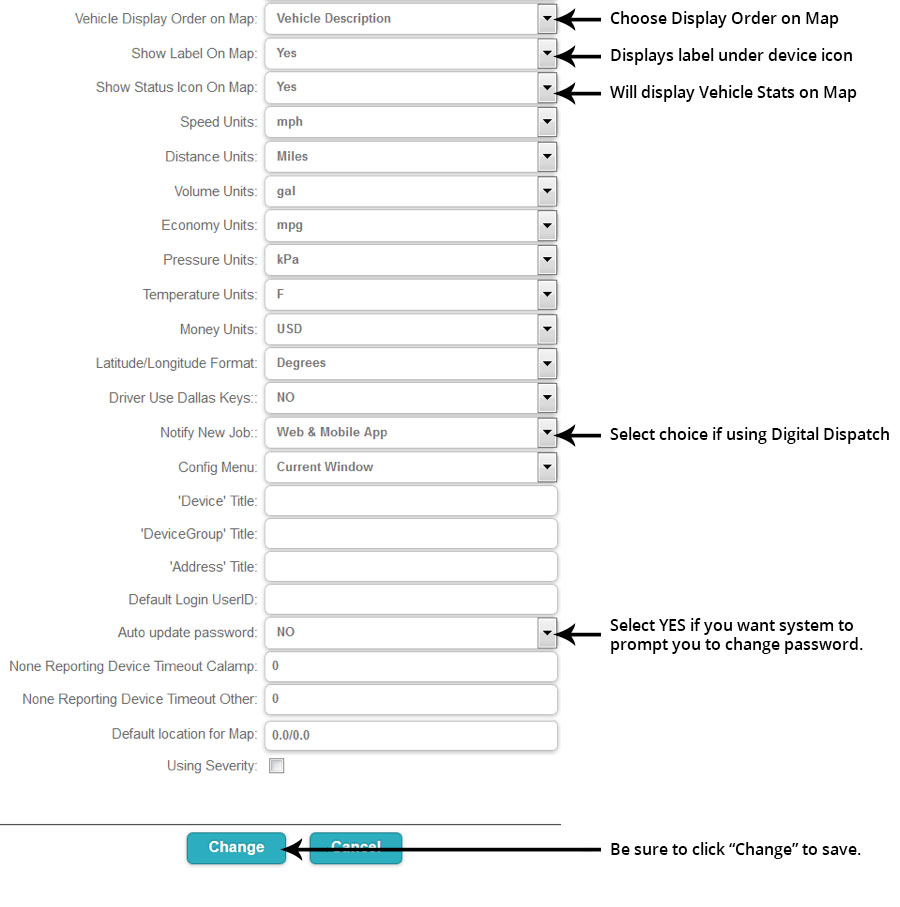
An optional feature is to have an icon displayed on the Map itself, under the vehicle icon, which will also display colored vehicle status and or direction the vehicle is traveling if moving. This feature is found under Account Administration which will be covered in another topic.
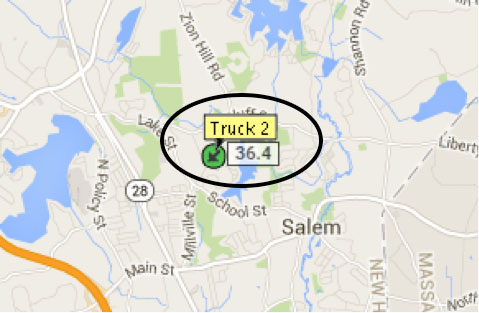
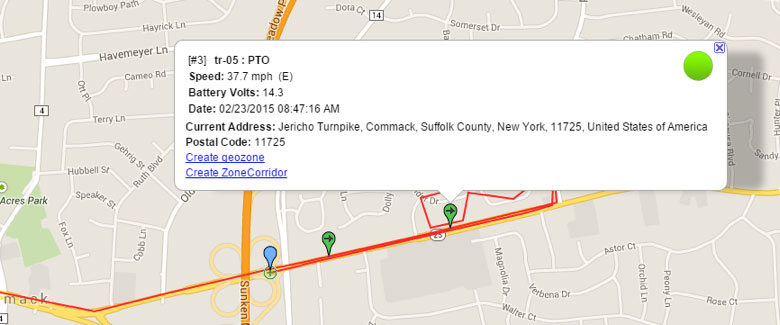
In example below, the green circle with arrow pointing south west indicates the vehicle is traveling south west and the box to the right is displaying the vehicle speed.
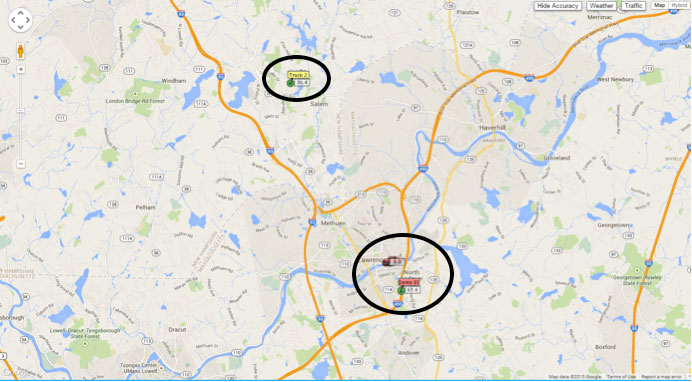
In addition to the vehicle information box on the left, your vehicles are also represented on the map, displaying their current location. The map will scale to display all of your vehicles at the same time. This allows you to visually see where your vehicles are at any given time.
To zoom closer to a specific vehicle, click on your specific vehicle in the vehicle information box on the left. This will give you a closer look at that vehicle as well as other vehicle information. To return to standard all vehicle view, click Mapping then Dispatch on the menu bar at the top of the page.
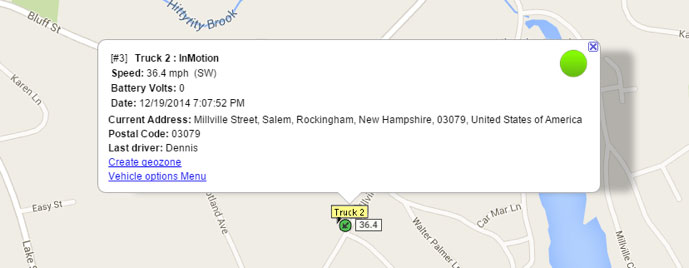
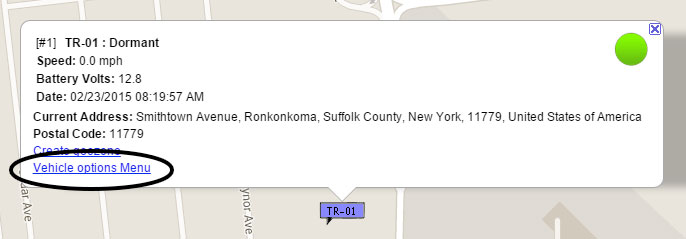
In the following example, I clicked on Truck 2 in the vehicle information box. The map zoomed into that specific vehicle and opened up the vehicle information dialog box. Click the in upper right hand corner to close this box.
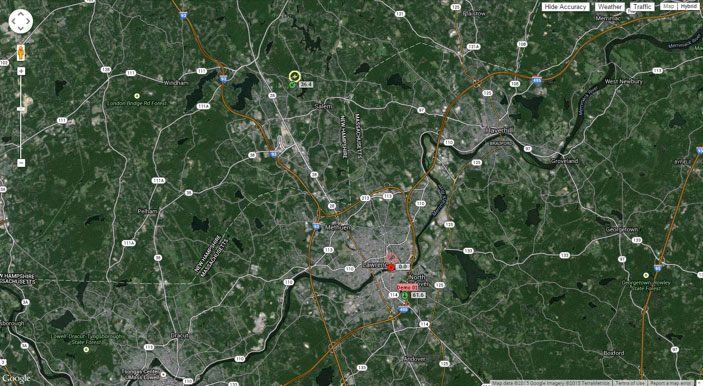
The default map display is your standard road map. To display a Satellite view click “Hybrid” at the top right of the map. To revert back to standard road map, click “Map” at the top right.
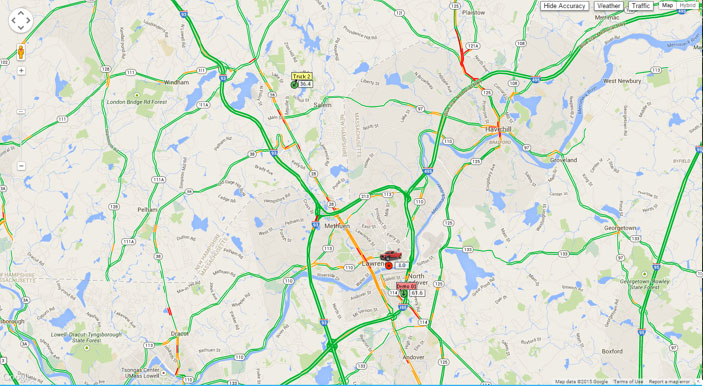
You also have a Live Traffic feature. This allows you to see current traffic conditions at a quick glance allowing you to alter your ETA if needed. Clicking “Traffic” at the top right of the map turns this feature on and off.
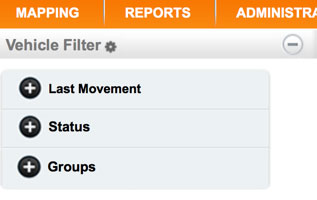
We have built in a feature that allows you to “filter” the view on your vehicles by different categories.
Last Movement, Status and Groups (we will cover “groups” in another topic)
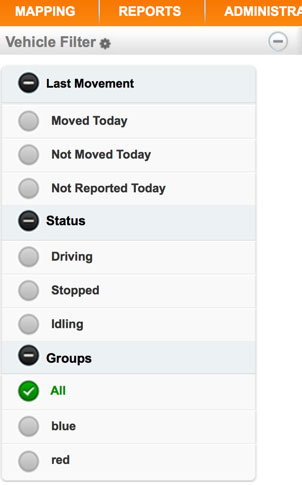
At the top right of the vehicle information box, you will see a icon. Click on the icon to open the Filter Window. Click on the icon beside each category to open the choices and select the choice you wish to view.
The vehicles that match the selection or selections you have made will be the only ones visible.
To close the selection or selections, simply click the icon.

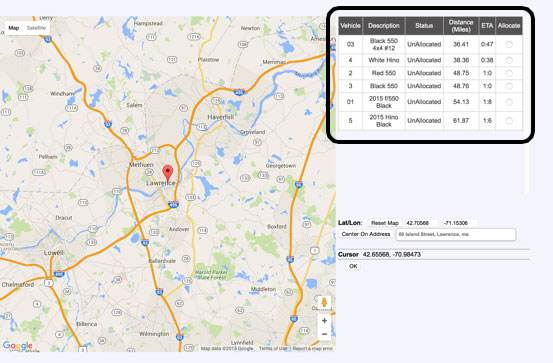
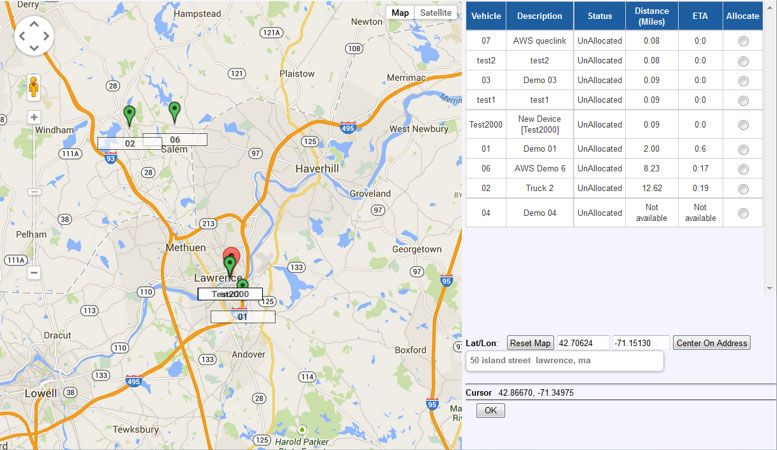
The platform and map gives you the ability to quickly locate an address on the map. This allows you to visually view the area, scale out to view where your fleet vehicles are in relation to the address and using the “Traffic” feature, you can see current traffic conditions in that area. By using the “Nearest” feature, in addition to seeing the address location on the map, you will see a list of all your vehicles, their current status, distance to that address and ETA to that address.
Using Nearest available vehicle could save fuel and improve customer satisfaction providing shorter wait times.
Finding Address
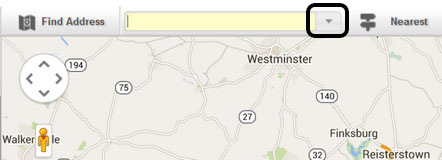
Enter the street address in the address box at top of map screen, click "Find Address"

Finding Nearest
Enter the street address in the address box at top of map screen, click "Nearest"

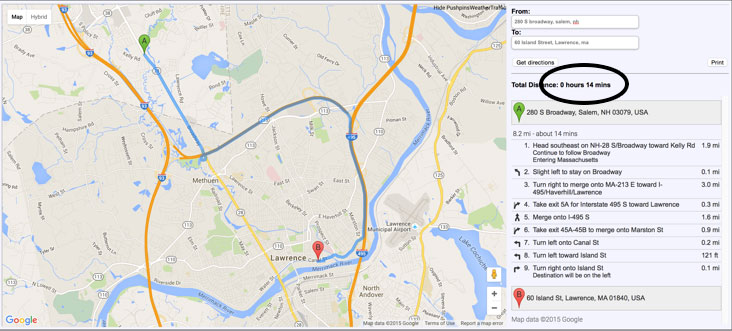
If you need to get driving directions from one location to another, click Get Direction at the top right of the map. This will bring you to the get directions map screen. Enter the starting and ending address. Click “Get directions” Directions and ETA will be displayed which can also be printed out.

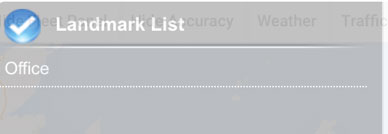
Clicking on the icon “LANDMRKS”, the platform will open a window to display the LANDMARKS (Geozones) which have already been created on your account. By clicking on the name of the LANDMARK displayed in this box labeled as POI List will zoom the map to that zone location, displaying any vehicles that are currently in that zone.
Creating a Landmark/Geozone will be covered in another topic.

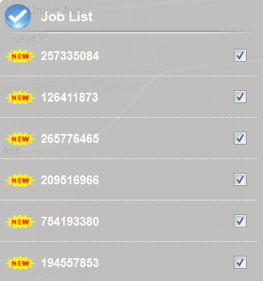
Clicking on the icon “JOBS”, the platform will open a window to display all the jobs currently not completed in your “Dispatch Manager” Jobs that are “NEW” are jobs that have not yet been assigned to a device or driver. Moving your mouse over the job, a window will open displaying a short summary of that job.
The map will also display icons representing the type of job and its disablement location. Click on the job icon on the map to open a window to display a short summary of that job.
On the Dispatch Map, there is a feature that allows you to quickly access your “Favorite Reports”
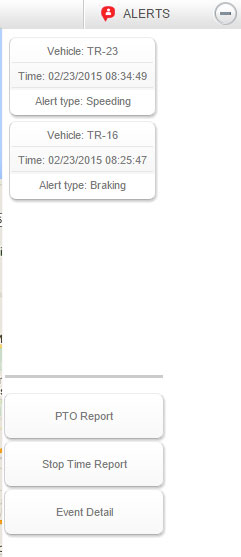
There is also the feature to see real time driver behavior alerts in real time.
At the top right of the Dispatch Map, you will see the heading "Alerts" and a icon to its right.

Clicking the icon will open the Favorite Alerts and Favorites Report Window. If there is an active driver behavior alert, it will be displayed at the top of this window. Click on the Report name to open that report.
The Vehicle Options Menu can be accessed by clicking the “MENU” Icon to the right of the vehicle information box, or by clicking the Vehicle Options Menu on the vehicle info box at the map level.

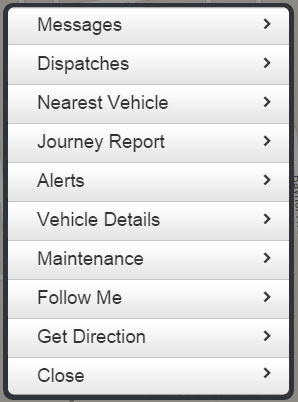
Messages → Allows 2 way messaging to Garmin Device.
Not currently supported
Dispatches → Displays a report of all active job dispatches assigned to the vehicle.
Nearest Vehicle → Allows you to determine the distance of your fleet in relation to this vehicle.
Journey Report → Short cut to Journey Report. See topic on Reports
Alerts → Allow you to search for Driver Behavior Alerts for a specific date range.
Vehicle Details → Short cut to view vehicle details and assigned driver to vehicle.
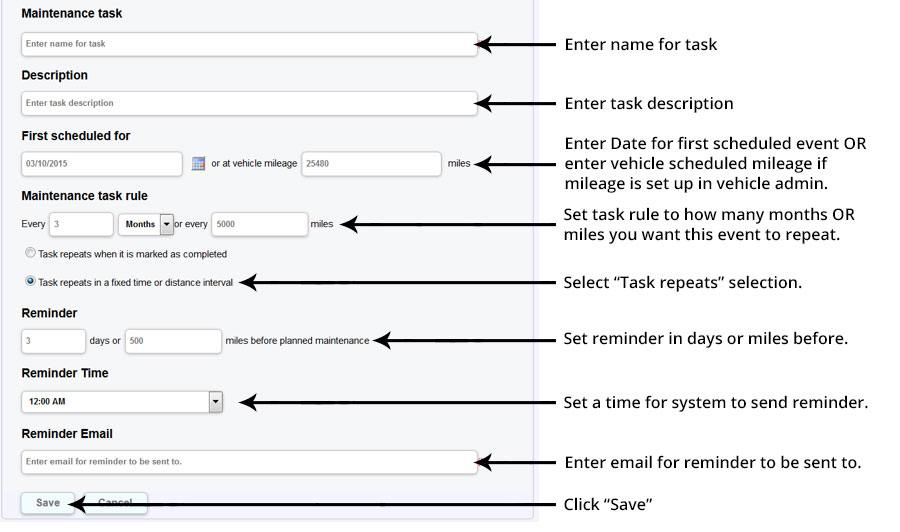
Maintenance → Set up vehicle maintenance tasks. See topic on Maintenance Admin
Follow Me → View the route vehicle has traveled for current day. See below
Get Directions → Opens get to direction feature populating current address of vehicle.
Close → Closes Options Menu.
Click the Mapping menu bar at top of screen to open the Mapping Selection Menu, select Vehicle Map.
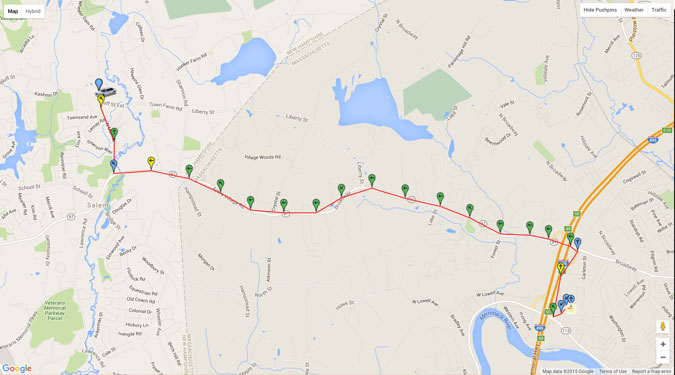
The Vehicle Map allows the user to have a clear view of the route the vehicle traveled for a specific date and or time range. You also have the ability to view each event. The platform will default to the previous our on same date.
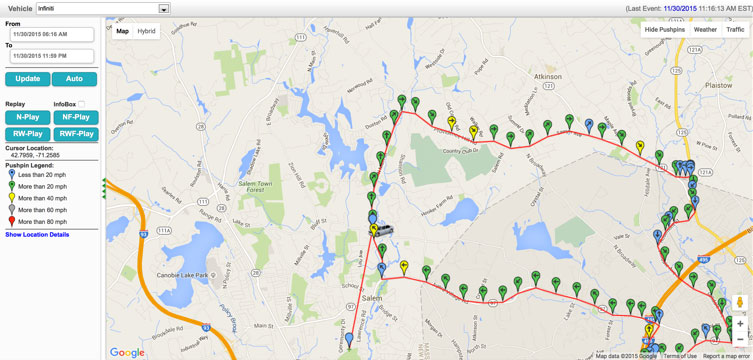
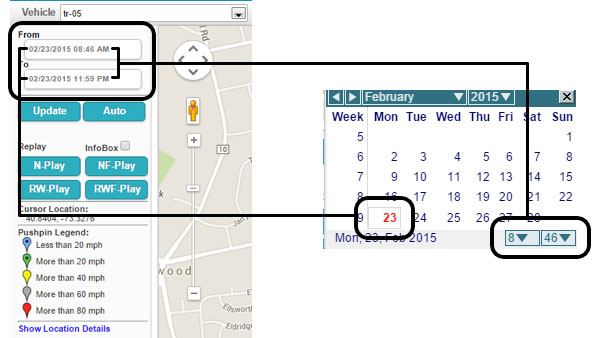
Select Vehicle from Drop Down Box.

Change Date and Time by click on date/time. Change the time at lower right corner then click on the date then click update.
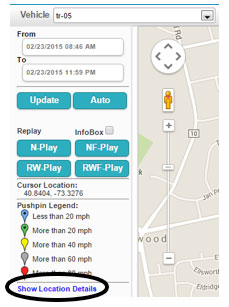
Click on “Show Location Details” to Open Vehicle Event Window. (Breadcrumbs)
You are able to play out each event detail on the map by checking “InfoBox” and then click “N-Play”.
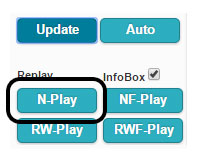
The Map will play out each event and give you that event’s description.
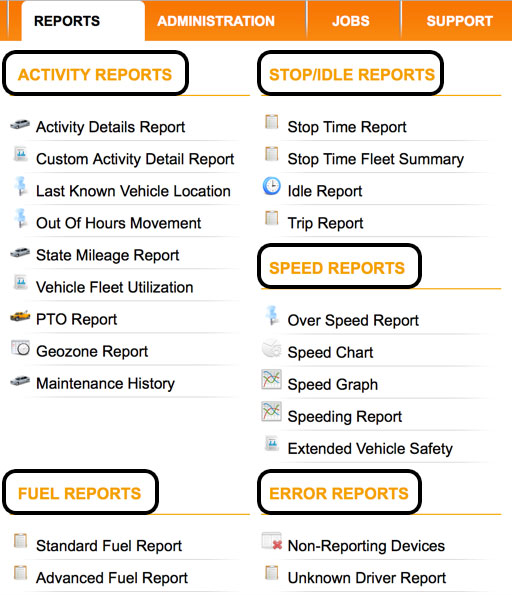
We provide a suite of many reports to help you manage your business. Click the Reports menu bar at top of screen to open the Reports Selection Menu. Reports are grouped into categories,. See Support Section of Manual. (Fuel Reports not available with this product.)
Most reports are self-explanatory, so we will review a few of the more popular reports.
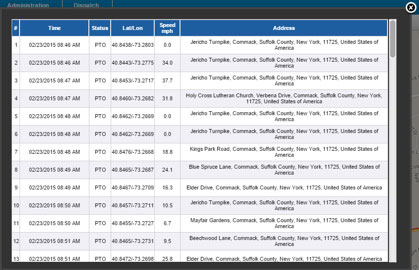
The Event Detail report allows you to see the events also referred to “Breadcrumbs” that the device/vehicle has recorded. Choose vehicle from Vehicle drop down list, select vehicle, choose date range then click view. The report will generate showing you all the events including Odometer Reading, Speed, Battery Volts, Address, Signal Strength and a link to the Map. Clicking the “Map” will open the map to that specific event and location. Click on the pushpin on the map to display event details.

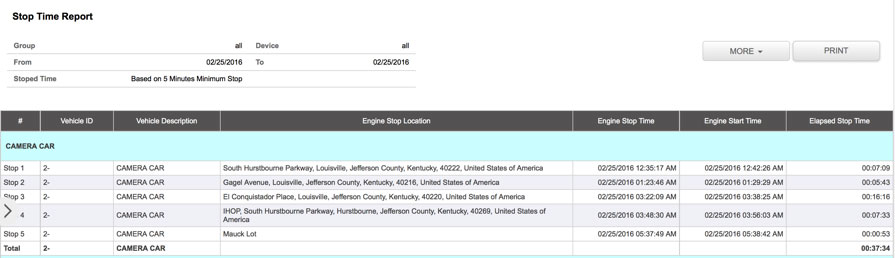
The Stop Time report allows you to select Group and Device/Vehicle, date range and Criteria. The report will display the Address/location and date/time where the engine was stopped, when the engine started again and how long the vehicle was stopped at that location. This shows you the vehicle/drivers downtime.
The journey report allows you to select Vehicle, and date range. The report will display the Start Time and Date, Start Address/location and Stop date/time and End Address, Duration of the trip, and Miles traveled. Clicking the Details link will give you the Event Details (Breadcrumbs) of that journey.

The idle report allows you to select Vehicle, and date range. Click “View” to pull report, Export to Excel to save report as a file, Send Email to email report. (Use a comma to send to multiple email addresses)
The report will display the Start Time and Date, End Time and Date, Driver if assigned, Vehicle ID, Vehicle Description, Address/location, total Idle Time, Over Idle (over 2 minutes) and Total points. Click Details to show map of where that event took place.

The PTO report allows you to select Vehicle, and date range. Choose a duration filter. Click “Go”, or “Yesterday”, “Last week” to pull report, Export to Excel to save report as a file, Send Email to email report. “View Map” will display the PTO events on the map.

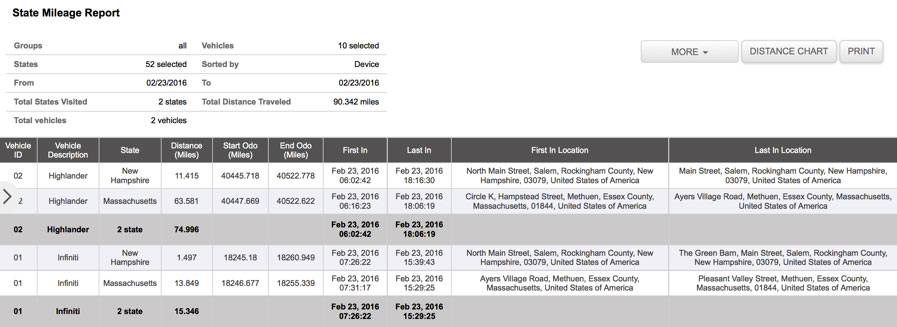
The State Mileage Report is very useful to monitor your vehicles mileage and driving hours in or outside of your home or designated state. Select Vehicle or all, chose your sort then choose Date or Date Range, click “View” or “Send Email” to pull this report.
The report will display the Vehicle ID, Description, State, Distance, Start Odo, End Odo, First and Last in date /time and First In and Last In location. Report includes summary of states and total miles.
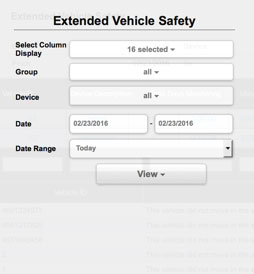
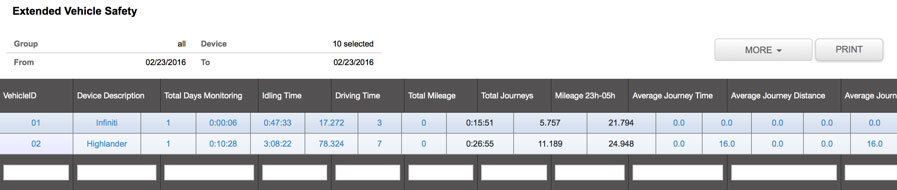
The Extended Vehicle Safety report is very useful to monitor your vehicles. Understand the wear and tear on your vehicle based on Miles driven, Harsh Acceleration, Harsh Braking, Cornering and Speed. Select your vehicle, multiple vehicles or all from the drop down box, choose From and To dates, click “View”, or choose any of the other options to pull this report. Select Columns Display allows you to select and un-select those fields you would like to view on this report.
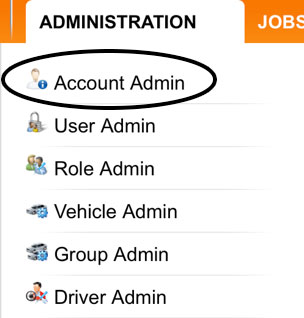
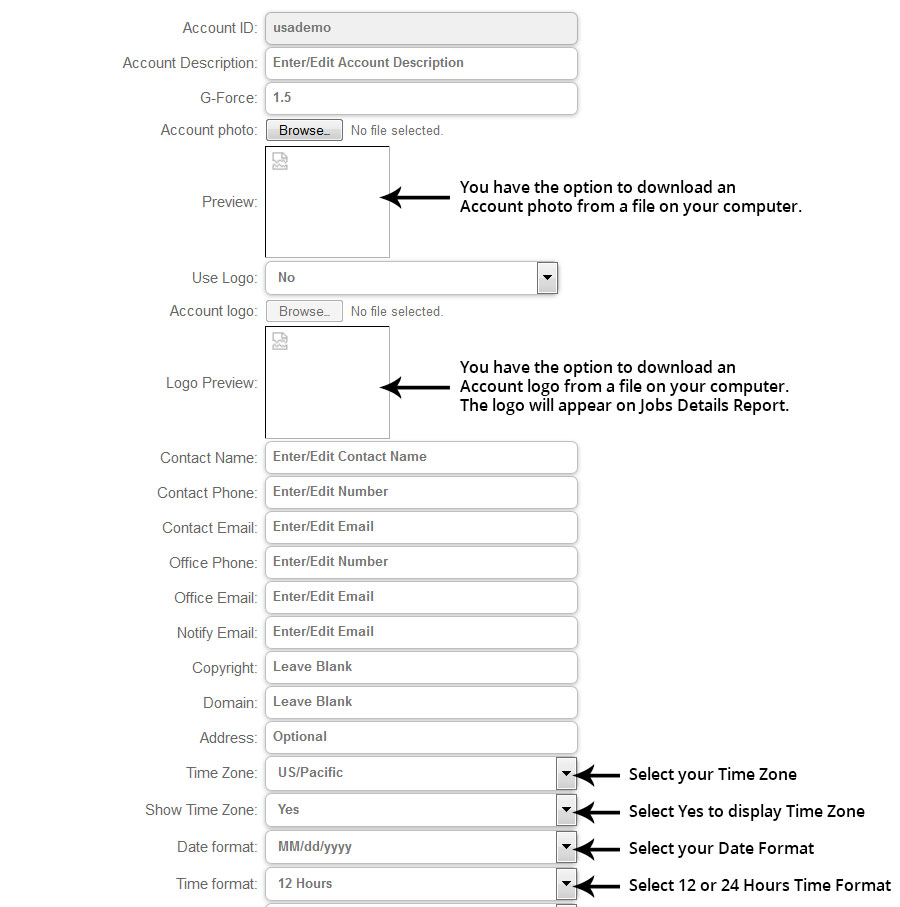
The Account is mostly set up for you already, but there are features you may want to update or include which are not set up as default. It is a good idea to review the Account Information and update or add any changes needed.
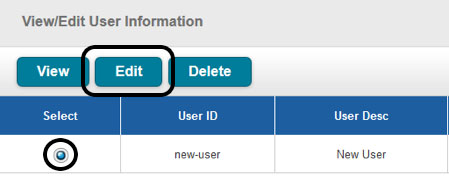
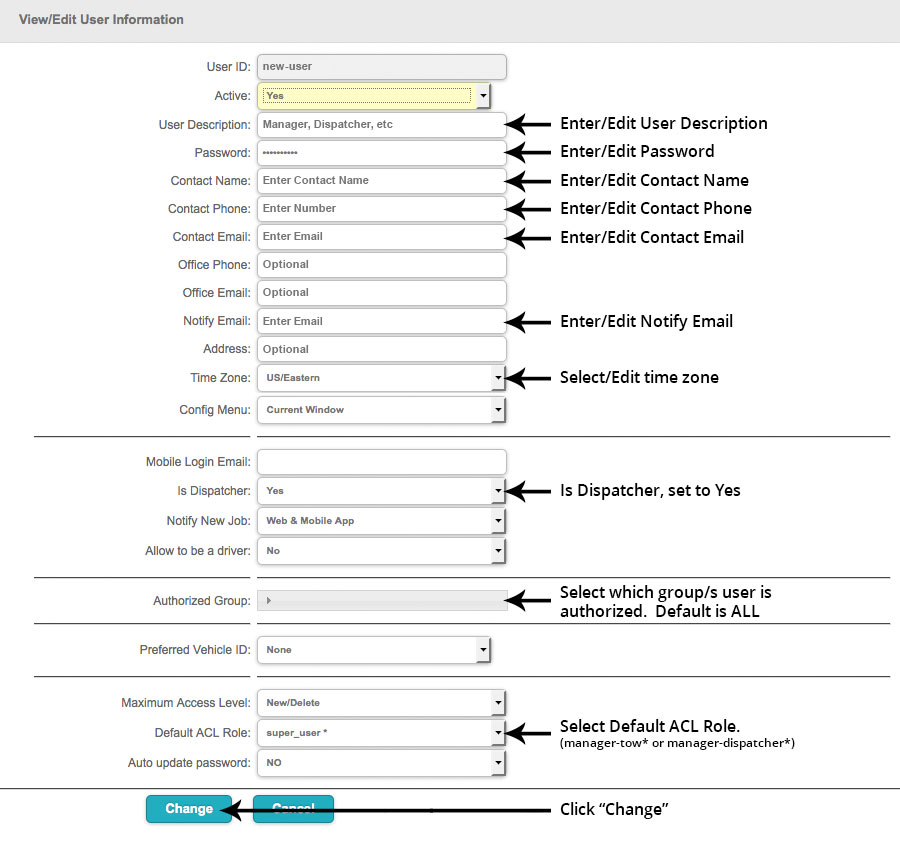
A User account is mostly set up for you already, but you may want to add a new user or edit an existing user. To create a new user, click “New” at the top right of the screen, Enter user name and click “Create” (user names can not contain spaces, so enter a “-“ to create a space)

Select the user you wish to set up and or edit and click "Edit"
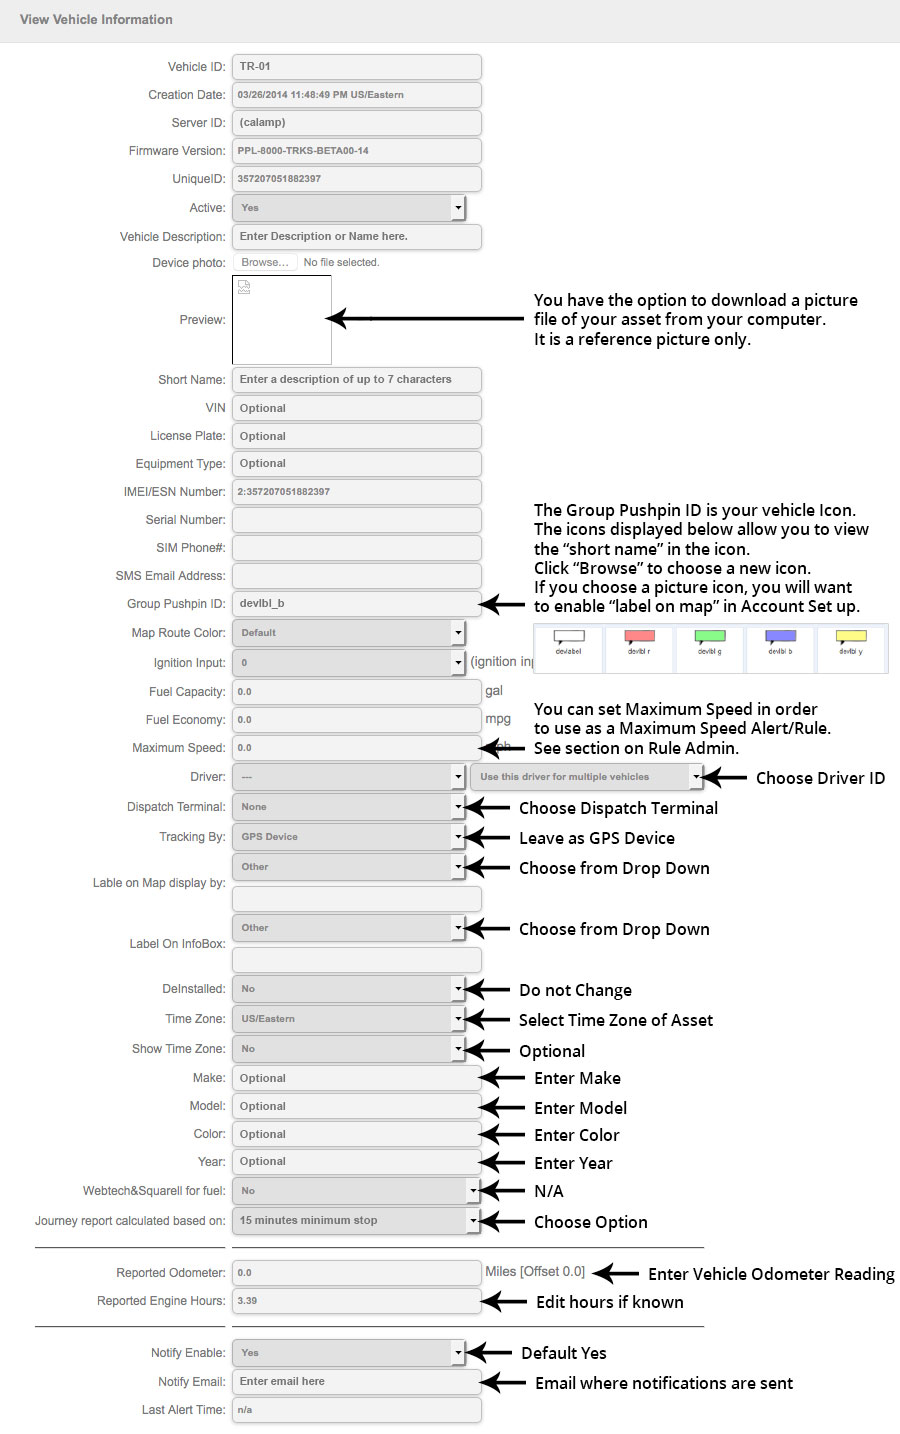
Your GPS devices are already added to your account with basic/default labeling and icons. You can change/edit or add descriptions/feature, and select device icon.
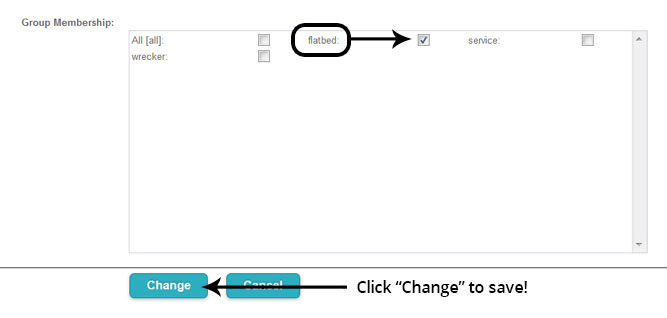
Choose which Group Membership this asset belongs to if Groups were created.
(See section on Group Admin)
Here you can create or edit Groups. Groups are useful to categorize vehicles, office branches or dispatcher assignments.
Click “New” then enter Group ID (No Spaces, use “-“ for a space), then click create. System will respond with message, “New Group has been created” click OK. Select the group and click “Edit” and a Group Name and click “Change”. A list of devices already assigned to that group may appear. See Vehicle Admin to add vehicle to group.


Drivers are an optional feature but are “Required” in order to use the Mobile App, Tow Dispatch.
Once a driver is set up, you would assign the driver to the vehicle under “Vehicle Admin”
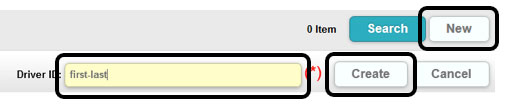
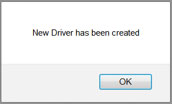
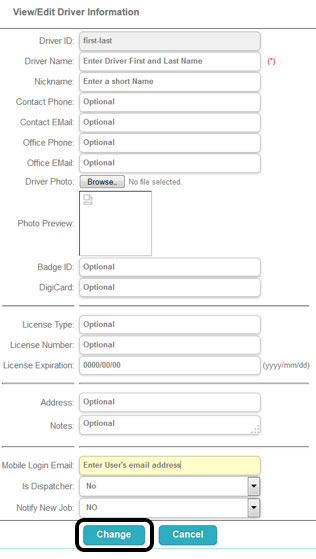
Click “New” then enter Driver ID (No Spaces, use “-“ for a space), then click create. System will respond with message, “New Driver has been created” click OK. Select the driver and click “Edit” and update driver information click “Change”.

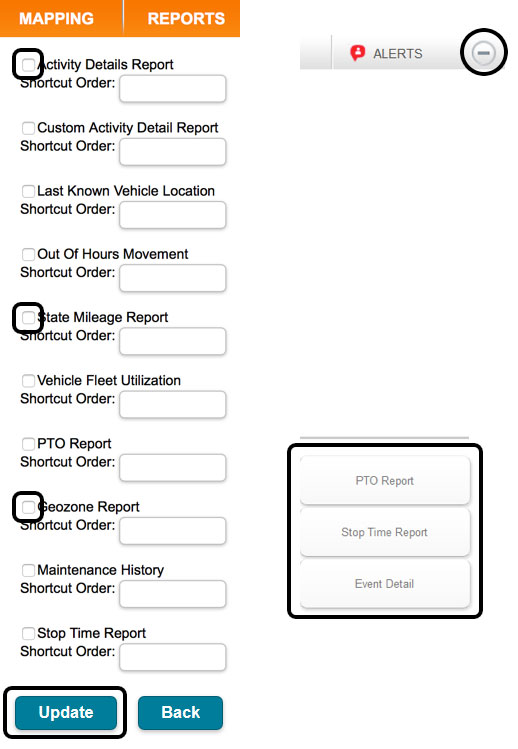
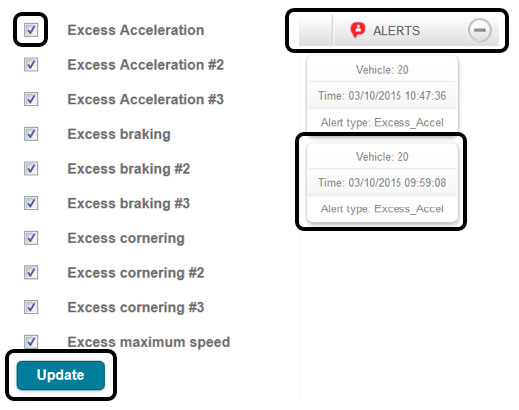
Open Favorite Report and choose the Reports you would like to list as a favorite, then scroll to bottom and click “Update”. The selected reports will now be available as a shortcut from the Dispatch Map under “Alerts”.
Click on the Favorite report to open that report.
Open Favorite Alert and select the Alerts you would like to list as a favorite, then scroll to bottom and click “Update”. The selected Alerts will now be available as a real time notification from the Dispatch Map under “Alerts” You will only see these alerts if this window is open and a driver behavior alert is present.
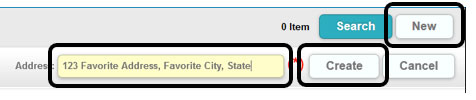
Open Favorite Address, click “New” and enter address you would like to list as a favorite, and then click “Create”. The Favorite Address will now be available from a drop down box from the address function on the Dispatch Map.
A Geozone is a designated area on the map that you define. You are able to view and send alerts when one or more of your devices/vehicles are in this zone. There are a couple of ways to create a Geozone.
From the Administration tab, select Geozone Admin. Click “New” and enter a ID for your Geozone. Spaces are not allowed so use a “-“ as a space, then click “Create”. This also is where you can edit/modify an existing Geozone if needed. From any vehicle status window on the map, you can also select create Geozone.

Click “Edit”, enter Description then enter the street address, then click Center on Address. Click on pushpin and drag it in to change the size of the zone to your preference. Click Reverse Geocode to display “Description” instead of address, Check Arrival and Departure Zone if you would like an email alert. Click Auto Notify to enable system to send email when vehicles have arrived or departed the zone.


Rules may vary by account. Please consult support for additional information.
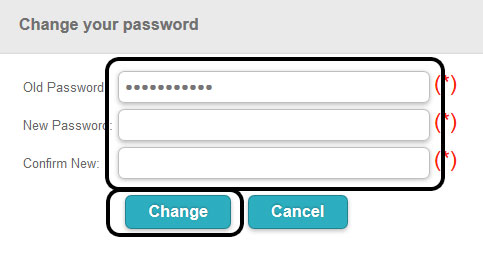
Changing your password is as easy as entering your Old Password, enter a New Password, Confirm New password and click “Change”
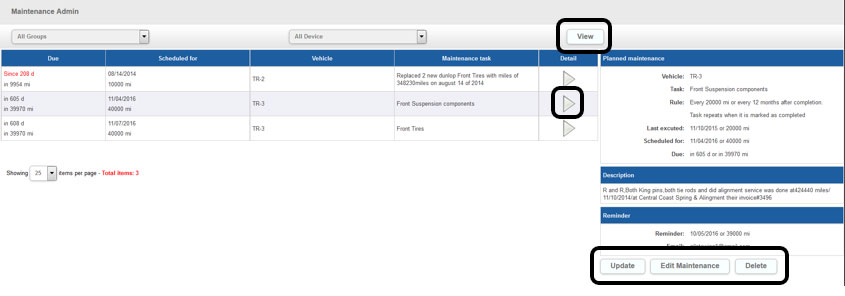
The Maintenance Admin feature allows you to view all Maintenance Tasks set up on your account. Click ”View” to see all tasks. Click “Detail” too see Planned Maintenance, Description and Reminder information. You may also Update Edit and Delete task here. Maintenance Tasks are created from the Dispatch Map, vehicle Options Menu. (Maintenance) See section on Dispatch Map.
The Schedule Admin feature allows you to view all schedules reports set up on your account. Click ”Search” to see all schedules reports. Click “Edit” make any changes or delete this scheduled report.

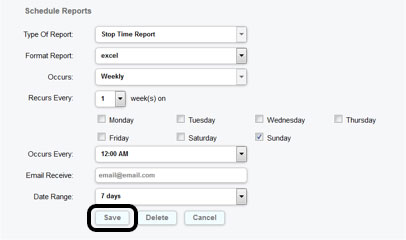
Reports are scheduled from the report heading under reports, if available. Click “Schedule”, select Group select Device etc., click next and choose the criteria and format for your report then click “Save”.


The Dispatch Features of the Platform and Mobile Applications are more advanced and online training, guides and or videos may be available through our Support Representatives.
The purpose of this section is to review the dispatch screens and their functionality.
The Allocate Jobs screen will show you jobs in your queue that have yet to be dispatched to a driver or are still in unassigned status. The jobs are displayed in the left hand column. If you click on the PO, the job details will open in a new window. You can select the job and drag and drop it to a vehicle that has a assigned driver profile. If the driver is using the Tow Dispatch Mobile app, the job will be sent to their mobile device. You can view jobs by date if they are in the past. You should always disposition each job which you can do manually as well.

The Jobs Manager screen will show you all your jobs in your queue and their current status and includes limited details. You can click on “Detail” on the right side to open the job details screen to see entire details of this job. From the “Status” column, you can select from the drop down menu to manually change the status of the selected job. The colored icons above, represent the different job status’s which are reflected in the vehicle information window of the Dispatch Map. You can change the view of which job status will be viewed by unchecking or checking off the status codes you wish to display.

The Completed Jobs screen will show you all your jobs in “Job Complete” status. You can sort by date or specific PO then click “Go” Click on “Detail” on the right to open the job detail screen.

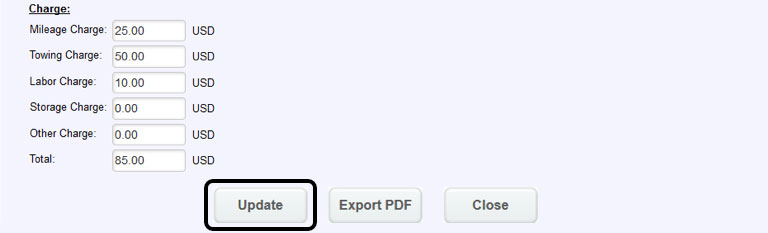
The Charges screen will show you all your jobs in “Job Complete” status and any charges that were entered on the job details page. If no charges were entered, the job will not display. You can click on “Detail” on the right to open the job details page and make any updates if necessary. Totals for the time period will also be displayed.

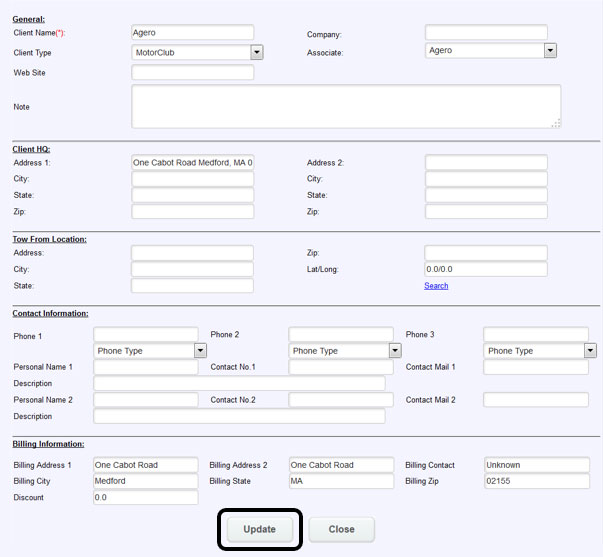
The Client Manager screen will show you all of the clients that are set up on your account. Clients can be selected on the Job Details screen if not assigned by Digital Dispatch. Click on the “Detail” link to view or update the client information.

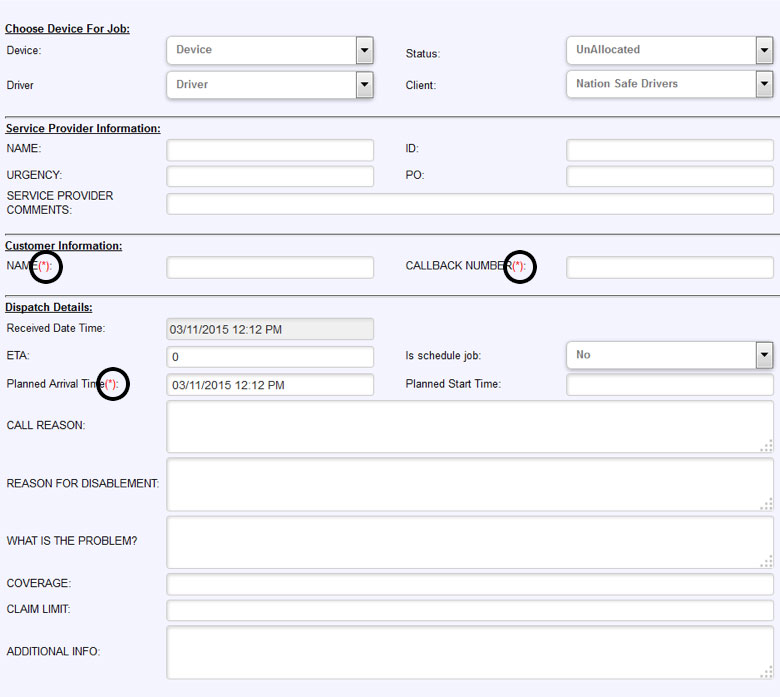
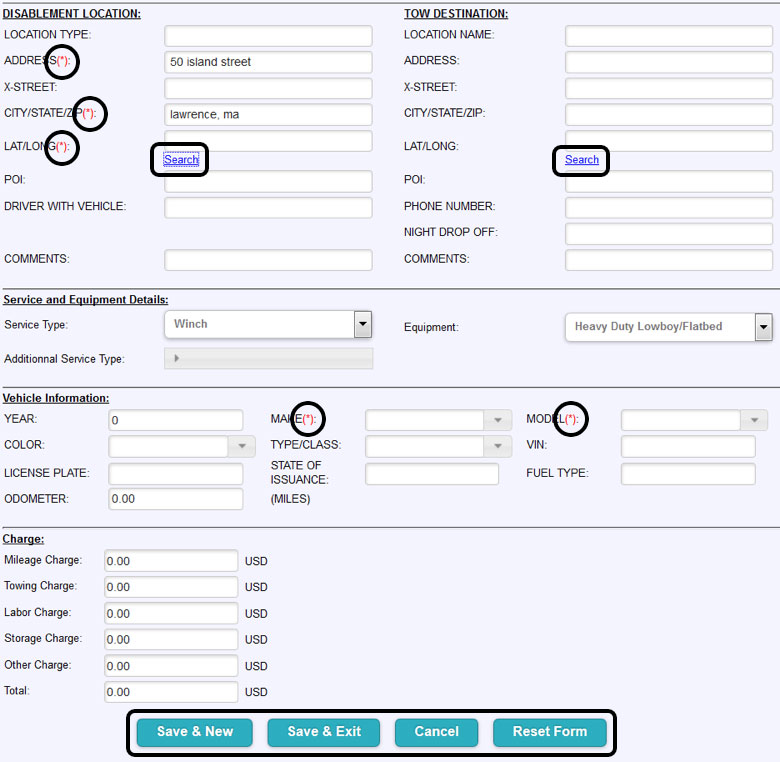
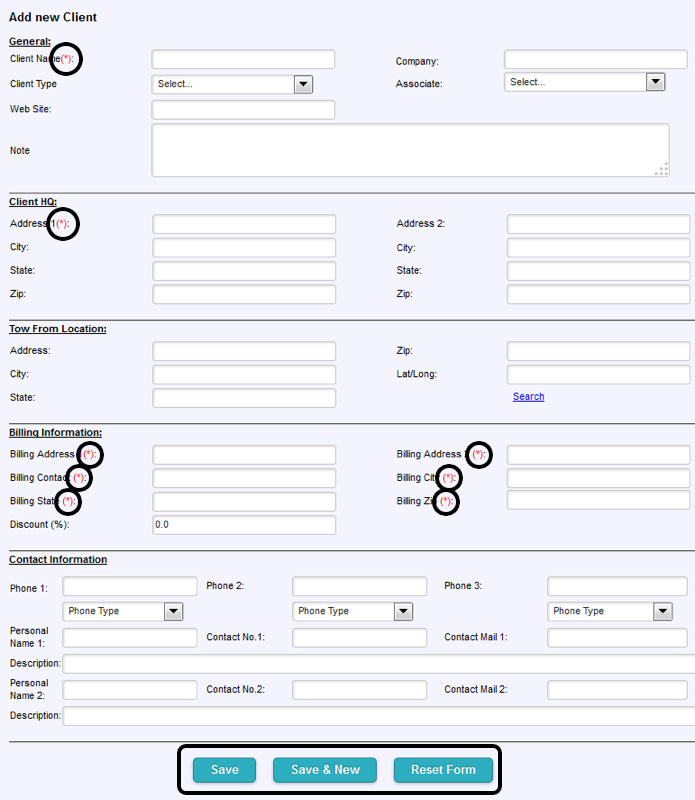
The Add new Job screen allows you to enter a job manually in the platform. (You can also enter new job from the Jobs Manager screen) There are many field that can be entered and most are filled in if job comes over through a “Digital Partner”, but if you are entering manually only the fields marked with an “*” are required in order to save and create a job. Enter all required information and click “Save and Exit” or “Save and New” to create job. Most fields are self-explanatory, but the LAT/LONG field needs a bit of explanation. After you enter the Disablement Location or Tow Destination, simply click on “Search” below the LAT/LONG field. The platform will open up a map to that address where you can visually check. Then simply click “OK” on the bottom right and the LAT/LONG will be filled into the form. Sometimes an address may not come up, so change the format a bit… basic information works best. See screen shots.
The Add new Client screen allows you to create your own personal clients and make them available to you in the platform. Enter the required information represented by the “*” and click “Save” or “Save and New”.
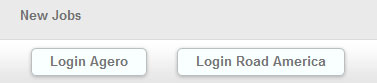
The New Jobs screen is your portal to log into our Digital Dispatch system to receive Digital Dispatch Jobs.
The Dispatch Features of the Platform and Mobile Applications are more advanced and online training, guides and or videos are available through our Support Representatives.

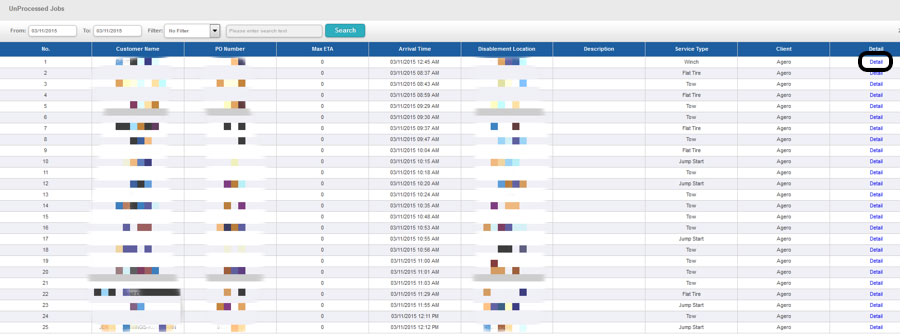
The Unprocessed Jobs screen will display all Digital Dispatch Jobs thast were transmitted by the Motor Club but not accepted by a platform user. Chances are the motor club called you with this job. Click "Detail" to view the details of this job transmission.